Integration Guides
Before you start
To start utilizing the API endpoints, you first need to create a Business Account. Your API and Secret keys can be retrieved from the Admin Panel; to do that, register your business account and request access to the Processing panel. Once your request has been approved by the support team, you will be able to proceed with creating your API keys.
Glossary
Here are the main terms we use:
-
Merchant - partner which integrated with Business API to accept Cryptocurrency payments from Customers
-
Customer - end user who uses crypto to pay for goods or services offered by a Merchant
-
Deposit - the act of Customer sending crypto from an external wallet to their Deposit Address, with the goal to increase the customer's account balance at Merchant
-
Deposit Address - dedicated blockchain address assigned to Customer for incoming deposits using specific Cryptocurrency and Fiat Currency
-
Consolidation Address - address that aggregates Merchant funds and is the source of outgoing operations
-
Withdrawal - customer-initiated transfer from the Consolidation Address to an external address
-
Callback - HTTP server-to-server notification sent to Merchant after key transaction events like new deposits, status changes or address rotations, for real-time processing
Getting the API and Secret Keys
To make API requests, you'll first need to get API and Secret keys from your Business Account Settings. This key helps authenticate your application and ensures it has the right permissions to access specific resources.
-
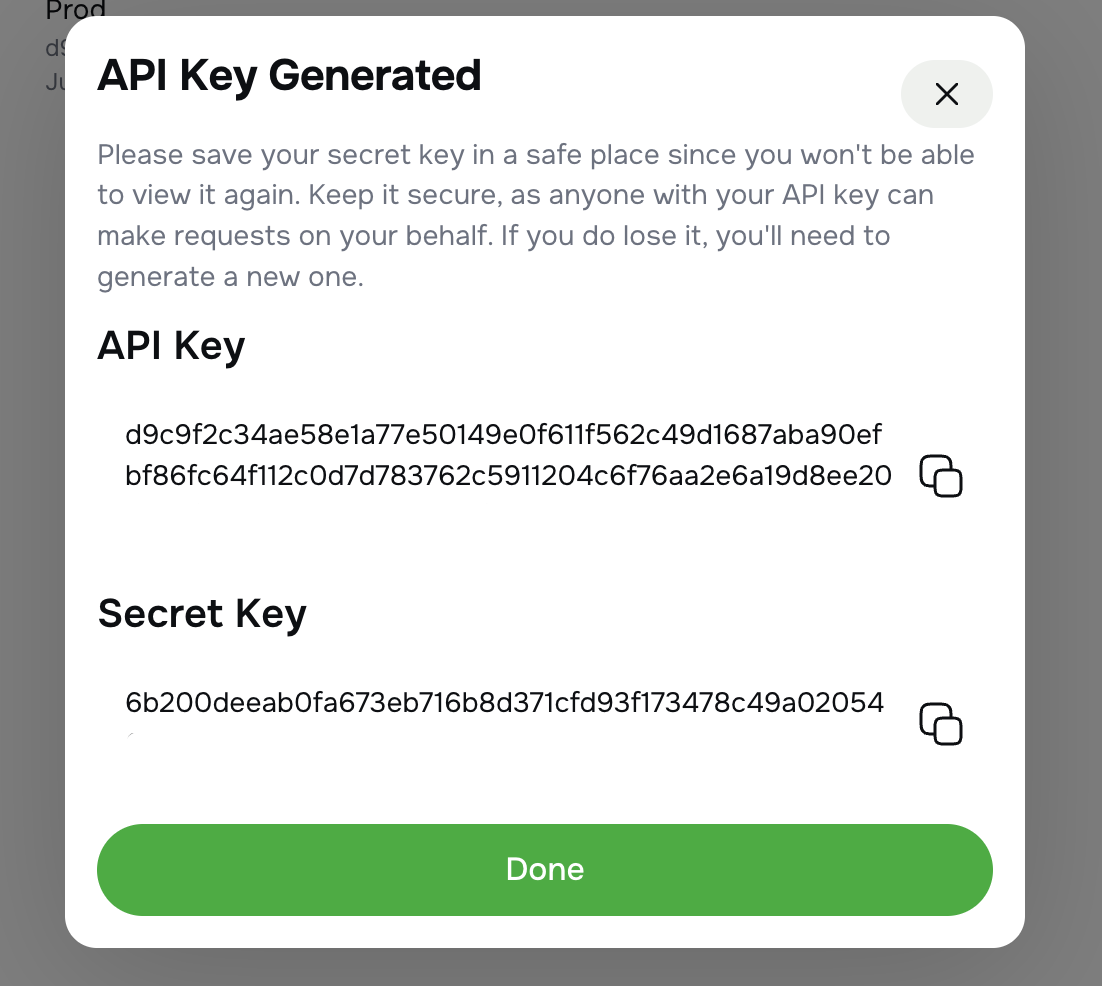
API Key: Your public merchant identifier. Send this in the api-key header with every request.
-
Secret Key: Used to calculate request signatures. Send this in the x-signature header with every request. This key must be kept strictly confidential.
Important!
Keep your API key and Secret Key confidential. Treat them like a passwords and do not share them publicly.
How to obtain your API and Secret Keys
-
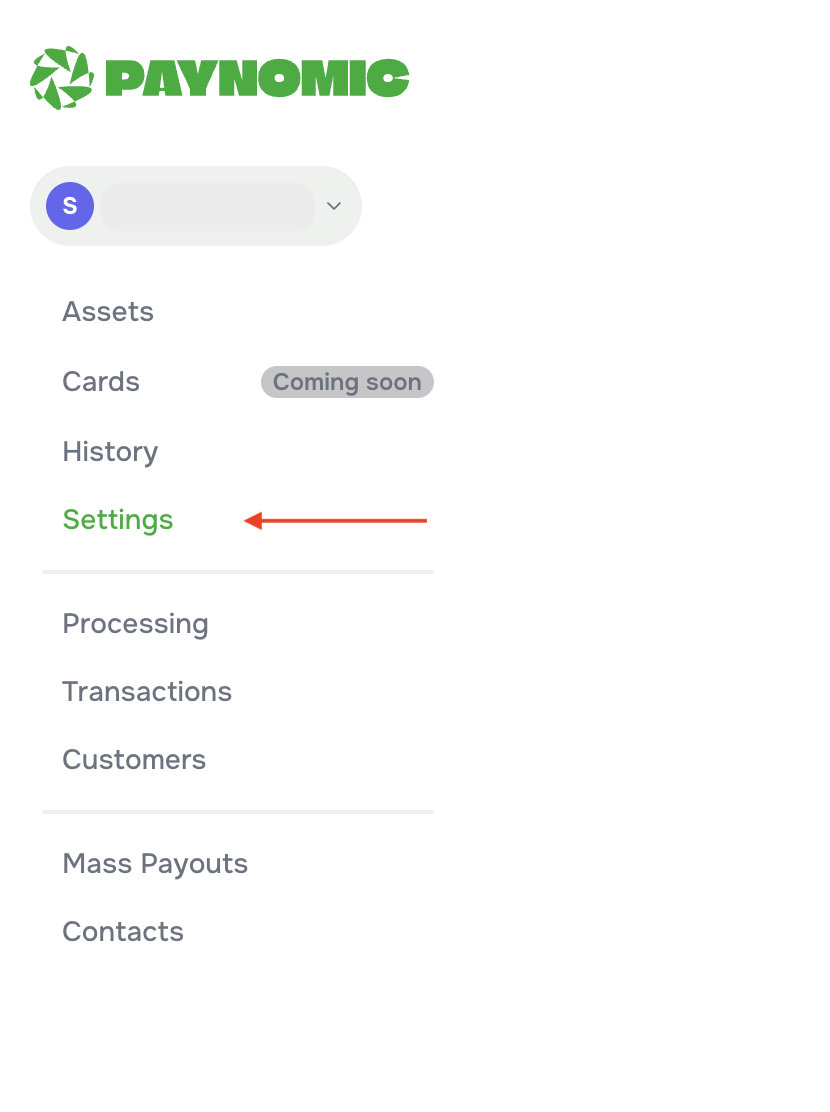
Log in to the admin panel.
-
In the left menu, click on Settings.
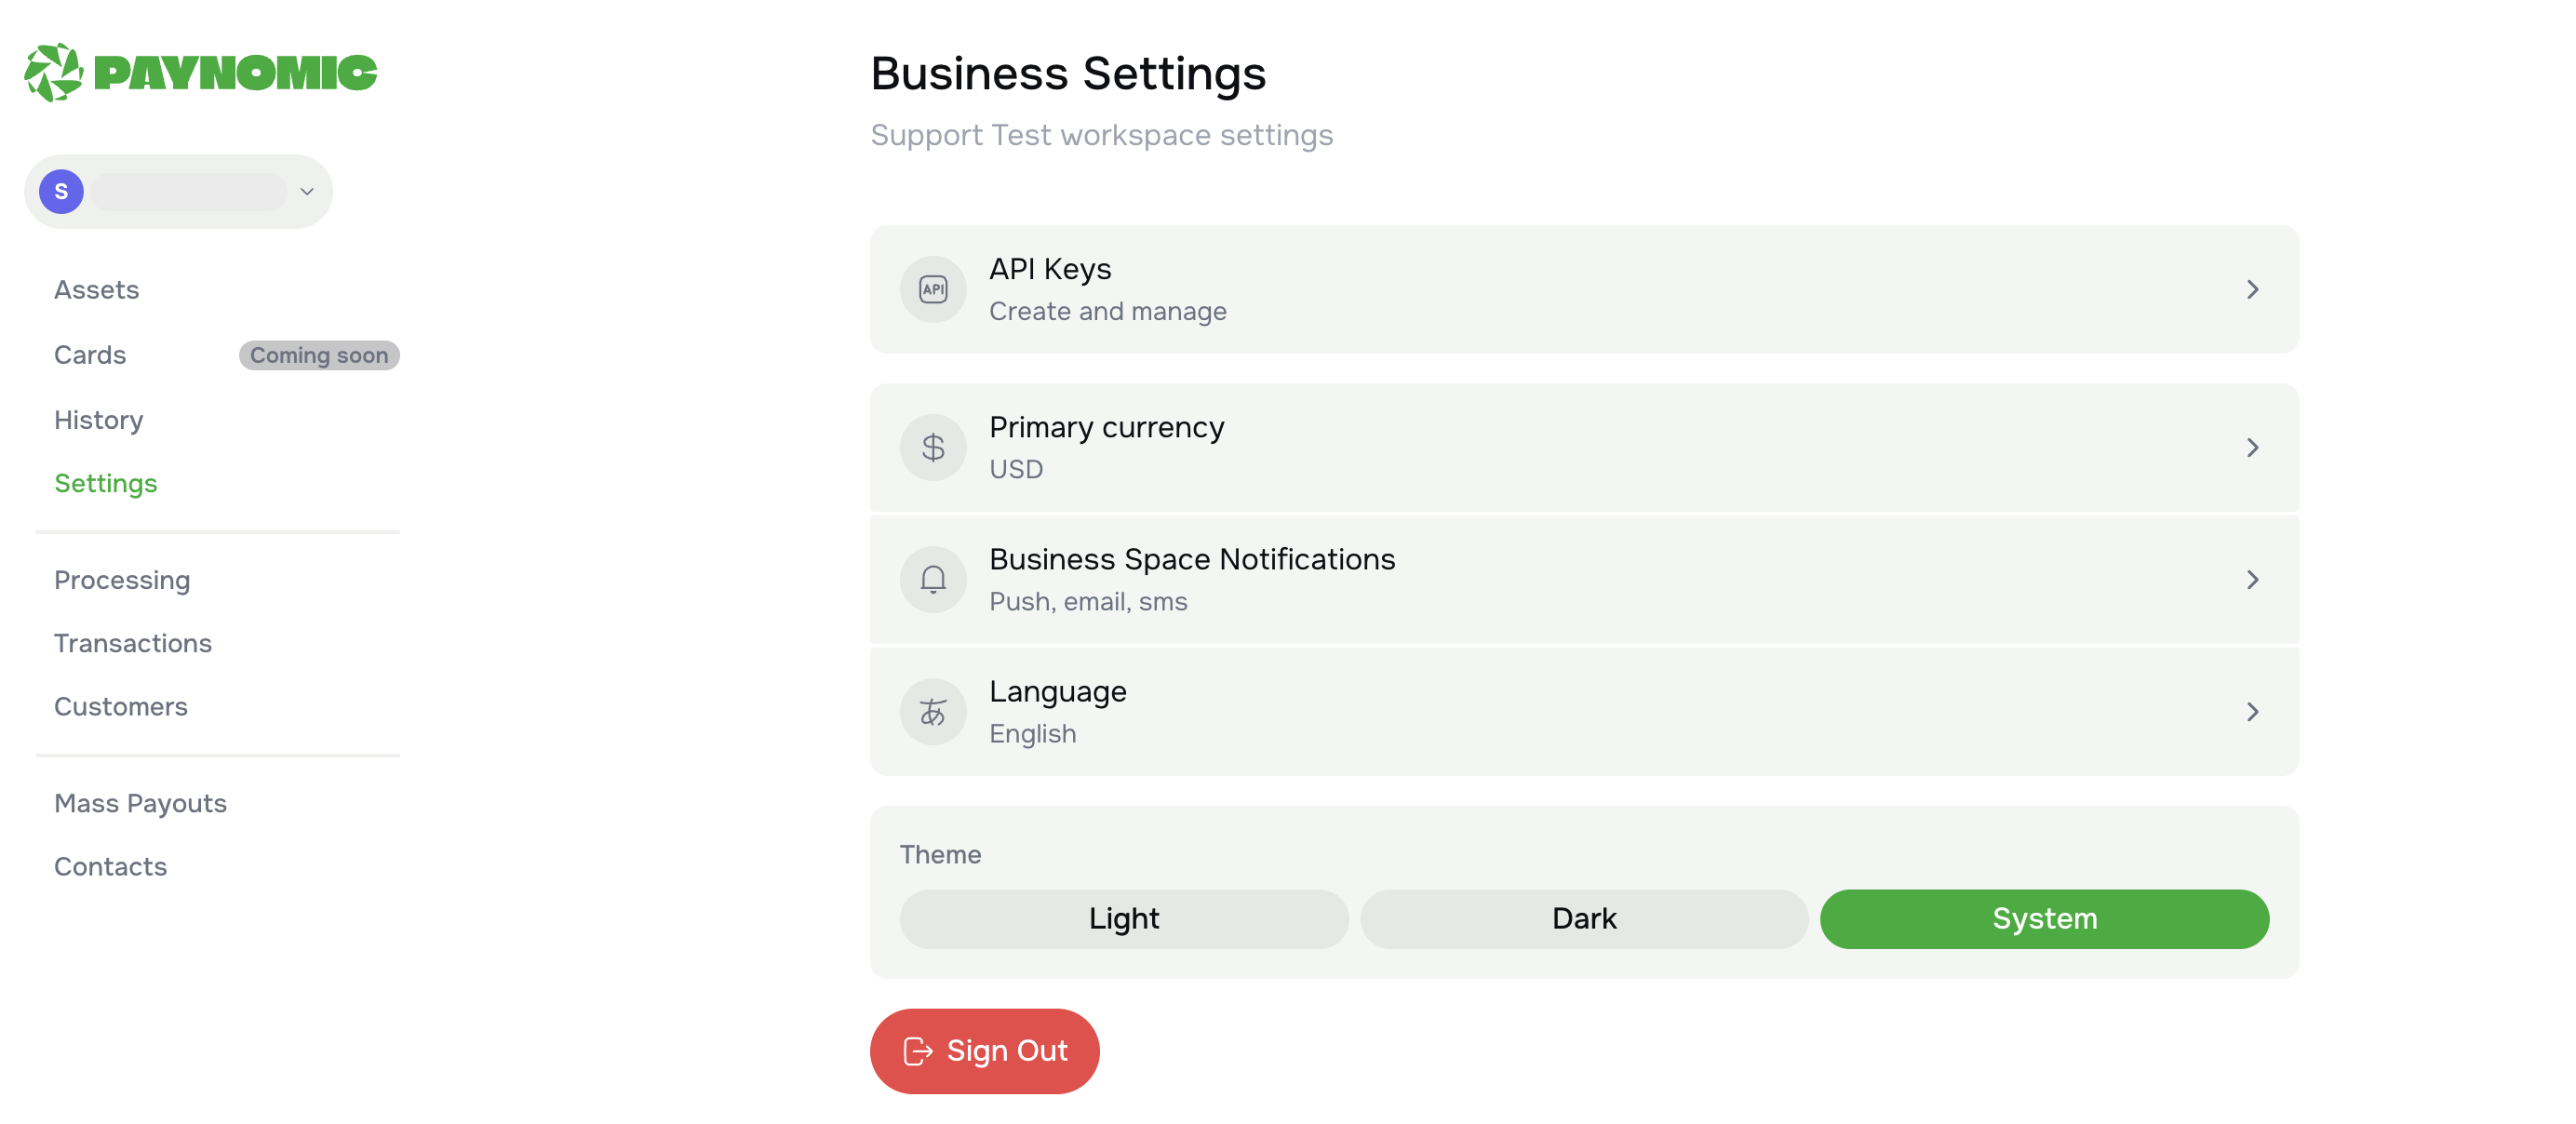
-
In the Business Settings page, click on API Keys. Then click on the button “Create new API Key”
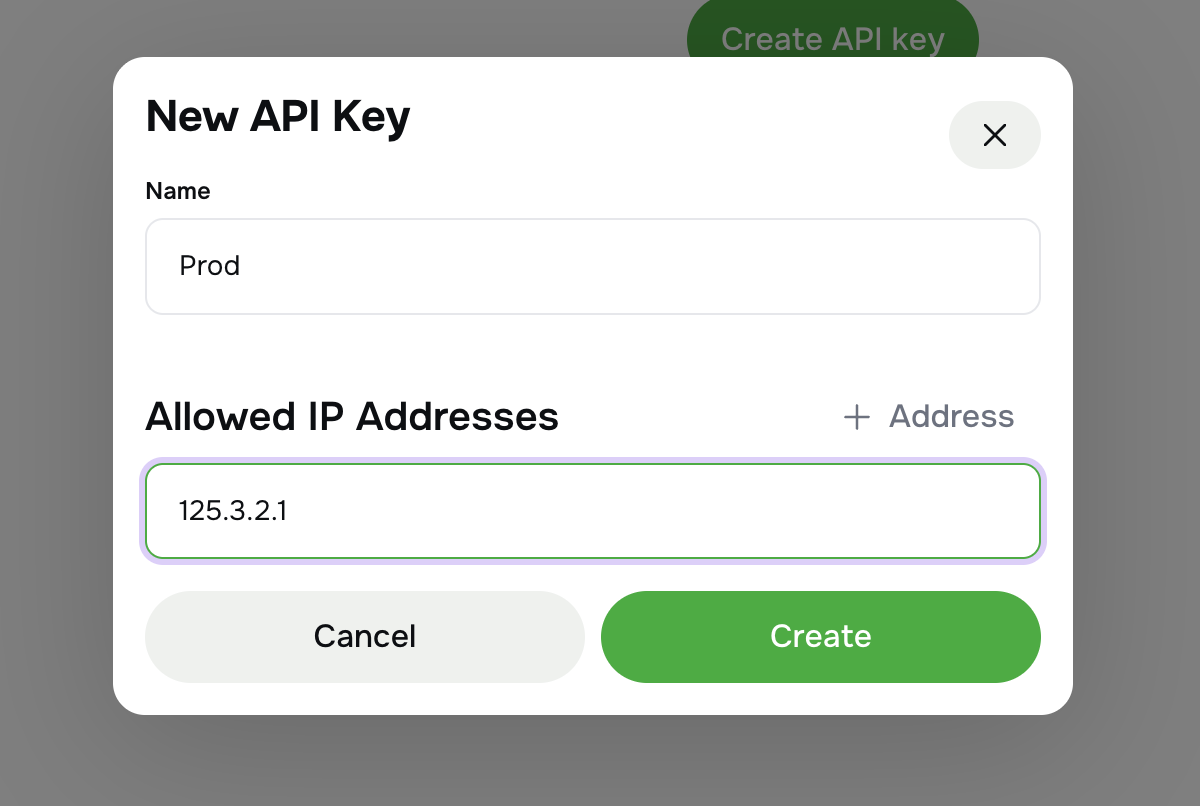
-
In the pop-up window that appears, you will need to enter a name for your API key and the IP address from which requests will be made and click on button “Create API key”.
Note: To ensure Business API can allow traffic through its firewall, you must provide the outbound IP addresses for all servers that will be making calls to the API. -
You will see your generated API key and Secret Key.
Transaction Limits
For API usage, all incoming transactions must meet a specific minimum amount based on the asset and network. Any request submitted below this limit will be automatically rejected.
Minimum transaction limits apply to the following operations:
-
DEPOSIT_AMOUNT;
-
PAYOUT_AMOUNT;
Minimum Limits can be adjusted depending on your contract. Standard minimum is here:
-
Minimum deposit amount:
20 USDT-TRC20 -
Minimum payout amount:
20 USDT-TRC20
Webhooks and Callbacks
Real-time webhooks notify your application the moment something important happens — for example, when an deposit order status transitions to “SUCCESSFUL”. Once an event occurs, Paynomic API sends an HTTP POST to the callbackUrl you provided when creating the deposit or withdrawal.
Add the Paynomic API callback IP range to your own firewall allow-list to ensure callbacks reach your servers.
Callback types
-
deposit - crypto funds received at a deposit address
-
withdrawal - crypto sent to an external wallet
-
addressRotation - deposit address replaced with a new one
For full descriptions see the Callback Reference in Paynomic API.

